
The project is available on GitHub. You can try it out in the browser. There is also a video demo:
Why do it?
Some time ago, I wanted to learn how to work with UI in Godot. And I didn't want to do a boring project. I wanted to recreate something interesting. My criteria for interesting UI:
- Unique layout.
- Combining 2D and 3D.
- Shaders.
- Badass style in general.
So, what game has an interesting UI? The first thing that came to mind, of course, was Persona 5! But it turned out there was a guy who had already made what I wanted.

This guy is making a game called Sinker Sound. It's a fishing rhythm game.
If it's done, then it's not interesting to do. How convenient that Persona 5 isn't the only Atlus game. The next game I looked at was Persona 3 Reload, and it has an interesting UI too! And no one recreated it yet!
Breaking things down
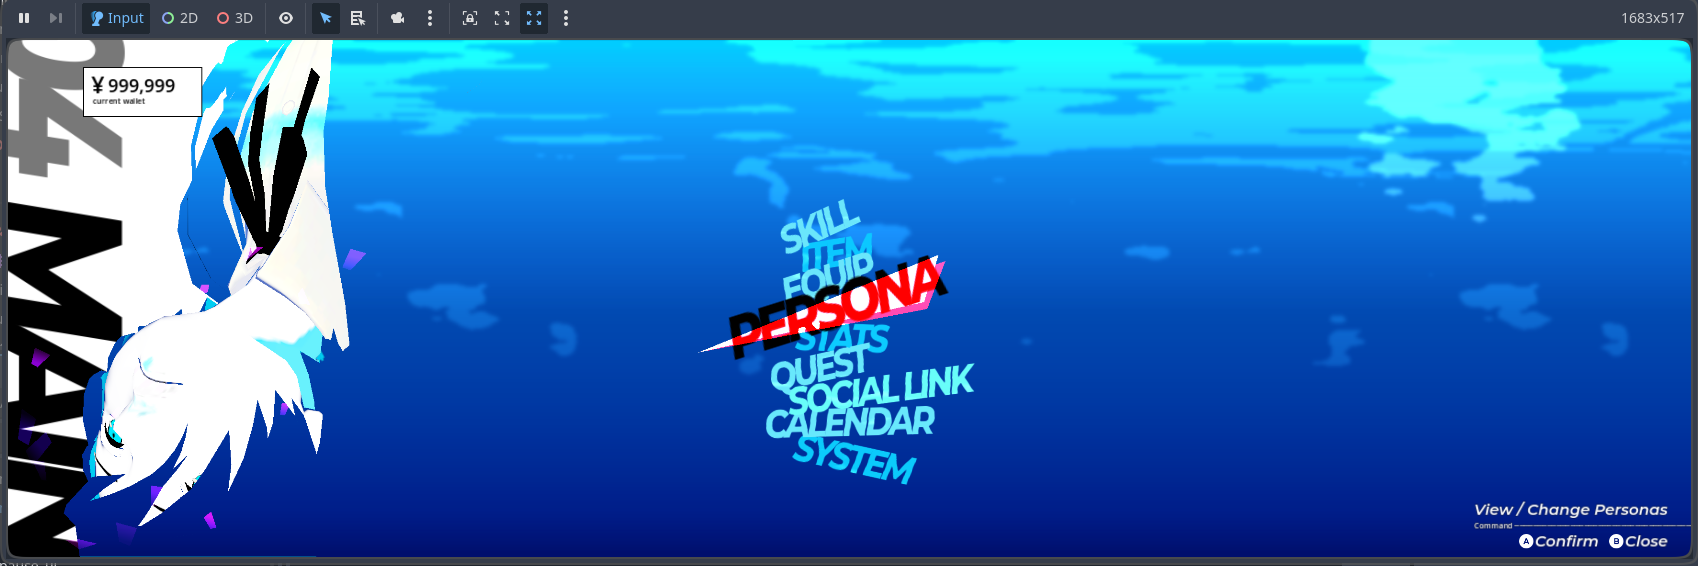
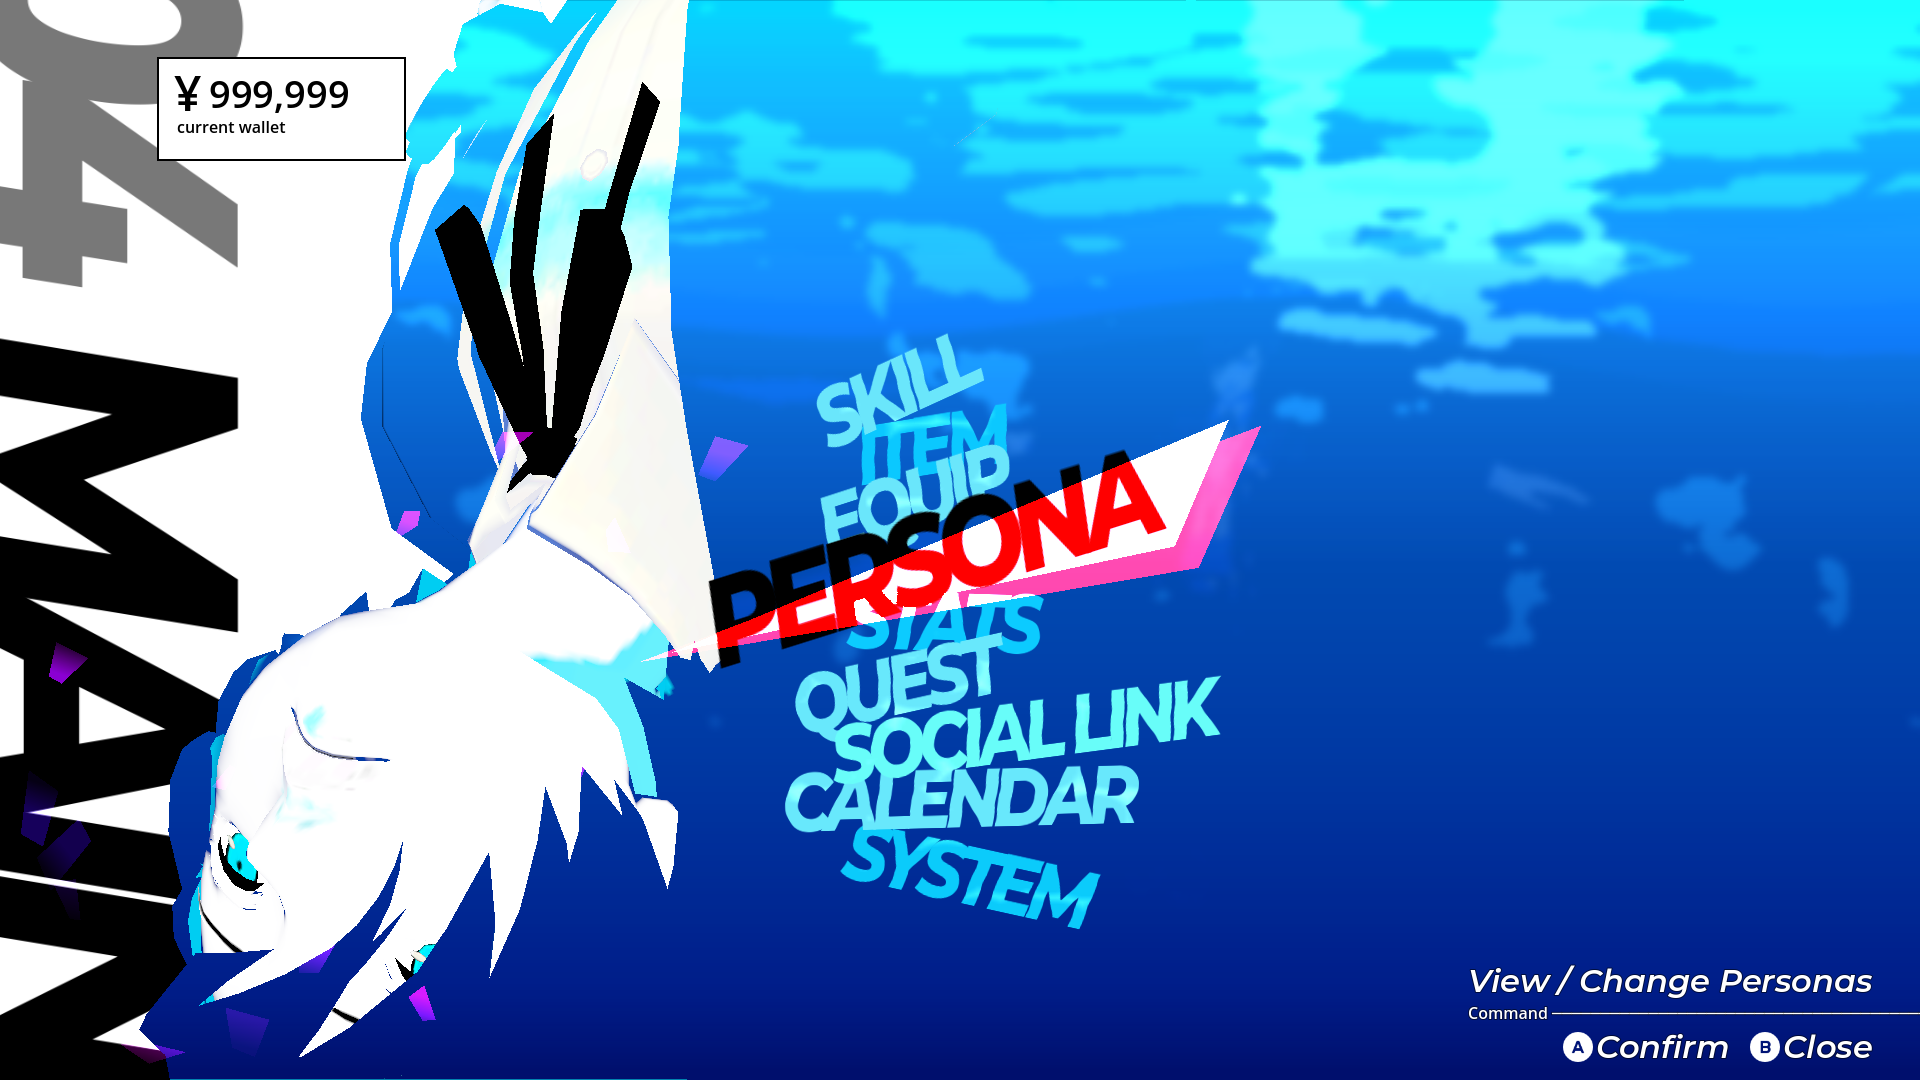
There's a great reference video. Making the entire UI is a big task, so instead, I picked only the main section of the pause menu. What elements does it include?
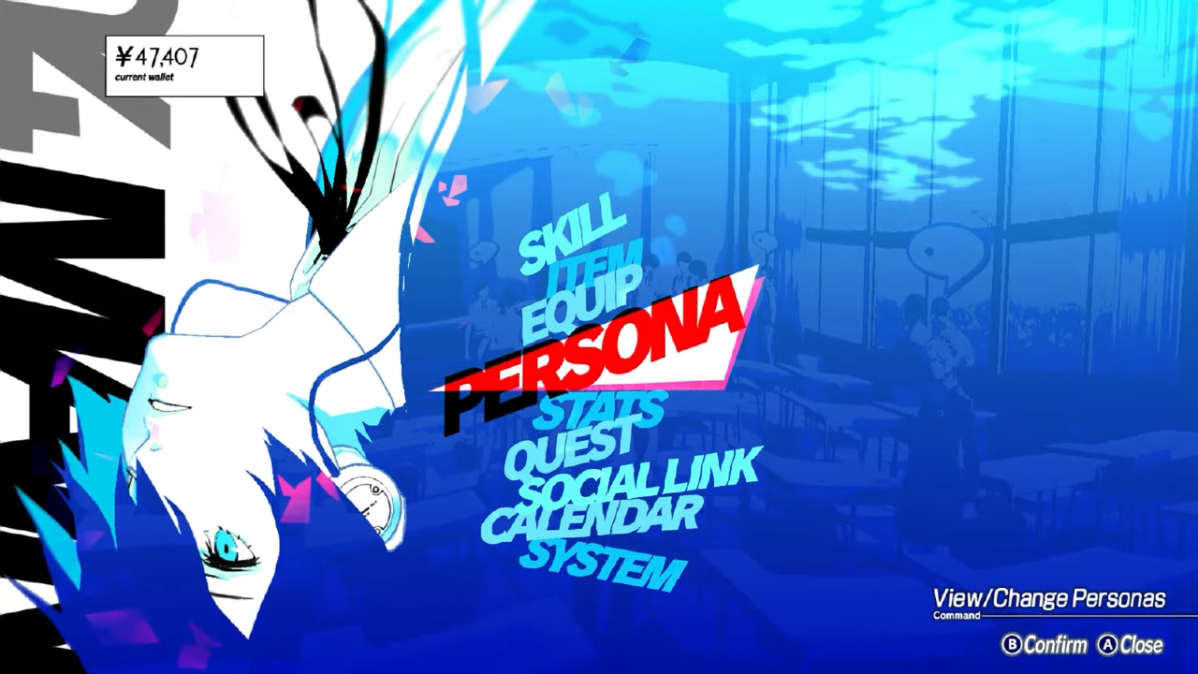
- A water-like background with blur, color mapping, and gradients.
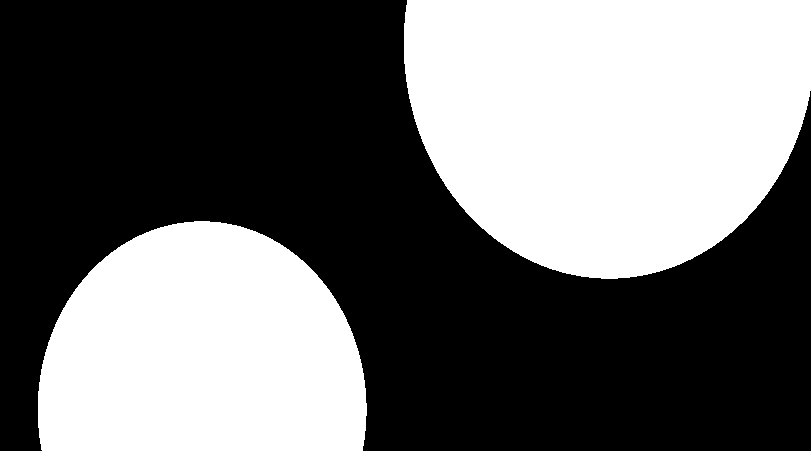
- Nice mask transitions between menu parts. One is a double-circle and the other is a wavy circle with scaled and bluish image inside, which transitions the same way but with different timings.
- An upside-down guy named Makoto. It's a 3D model that is used as a mask for the background.
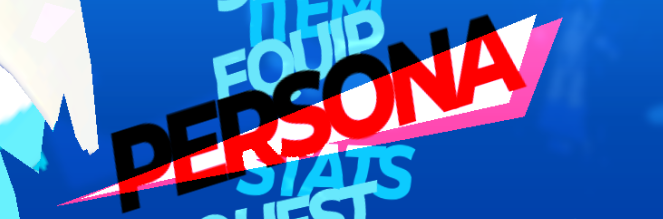
- A cursor for selection. It consists of triangles that are used as color masks.
- Text ribbons, flares, spawn and hover animations.
- Mask transitions when the menu opens. It consists of frames drawn by a real artist!
- Menu state info, like information about the current selection and amount of money.
- "Confetti!" These are polygons with
addcolor mixing.
I thought I had to figure out these things by myself, but Acerola had already analyzed Persona 3 Reload's rendering pipeline, UI included. Cool!
That's it. Surely I can make it one week. It took me three weeks to complete. I also made some tweaks here and there when I wrote this article.
Making UI
When I listed the tasks to do, I actually enumerated them. The hardest thing to do was that background stuff, so I began my journey with this.
Background caustics
Thanks to Acerola (again), I didn't need to break this task down into smaller tasks myself. So, here is what I need to do:
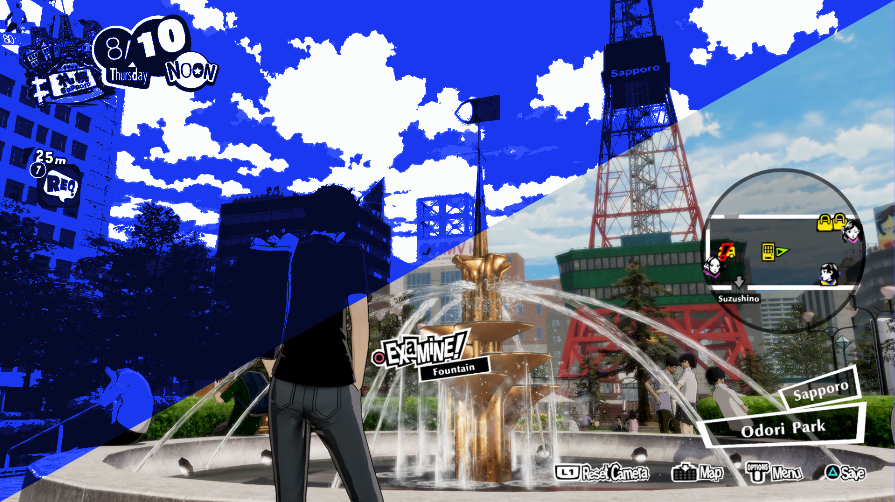
- Use the gameplay frame as the background base.
- Distort the background, mimicking water flow.
- Map the background colors to water-like colors.
- Add a bubbles and ripples overlay.
- Repeat the 4th step again with different ripples and without bubbles.
- Add blur.
- Add some gradient shading.
The first thing I listed, I made last. I rendered gameplay in one viewport, and then just stopped rendering it and gave the viewport texture to post-processing shaders.
Distortion is simple too. I wrote a shader that distorts a scaled image with a sine function. The image is scaled by a value calculated with wave amplitude. I did this to include parts that are not on the screen because of distortion.
shader_type canvas_item;

uniform float amplitude = 0.1;
uniform float speed = 10.0;
uniform float wave_length = 2.0;
uniform sampler2D screen_texture: hint_screen_texture;

void fragment() {
	vec2 scaled_uv = vec2(amplitude) + SCREEN_UV * (1.0 - amplitude * 2.);
	vec4 color = texture(screen_texture, scaled_uv + vec2(0.0, sin(SCREEN_UV.x  / wave_length + TIME * speed)) * amplitude);
	COLOR = color;
}
Color mapping is simple too. I calculated the background luminance and mapped it to a gradient with constant steps. The gradient I used looks like this: █████.
shader_type canvas_item;

uniform sampler2D gradient_texture: source_color, repeat_disable;

void fragment() {
	float luminance = float(0.299 * COLOR.r + 0.587 * COLOR.g + 0.114 * COLOR.b);
	vec4 gradient = texture(gradient_texture, vec2(luminance, 0.0));
	COLOR = gradient;
}
The luminance formula is defined in ITU-R BT.601. It was invented by some smart people with big brains and it works quite well. All shader programmers use it.
Bubbles and ripples overlays... Well, this is the thing I began with. I thought the Atlus team used some kind of a smart shader for this. So I ended up writing some big-vision, little-skill caustic shader. It takes noise and hand-drawn mask textures and combines them with AND operations.
The shader also updates with constant time steps, not every frame. This way, it looks better. Maybe it's because we don't see these unrealistic bubble interpolations and just imagine them ourselves.
Here is a code for caustics with bubbles (darker):
shader_type canvas_item;
render_mode unshaded, blend_add;

uniform sampler2D SCREEN_TEXTURE : hint_screen_texture, repeat_disable;

uniform sampler2D pattern_texture: repeat_enable;
uniform sampler2D pattern_mask_texture: repeat_enable;
uniform sampler2D bubbles_texture: repeat_enable;
uniform sampler2D bubbles_mask_texture: repeat_enable;

uniform vec4 color: source_color;
uniform vec2 velocity_main = vec2(0.0, 0.04);
uniform vec2 velocity_second = vec2(0.0, 0.04);
uniform vec2 velocity_bubbles = vec2(0.0, 0.04);
uniform vec2 scale_main = vec2(1.0);
uniform vec2 scale_second = vec2(1.0);
uniform vec2 scale_bubbles = vec2(1.0);
uniform float cut: hint_range(0.0, 1.0, 0.01) = 0.5;
uniform int updates_per_second = 1;

void fragment() {
	float pattern_1 = texture(pattern_texture, scale_main * UV + velocity_main * floor(TIME * float(updates_per_second)) / float(updates_per_second)).r;
	float pattern_2 = texture(pattern_texture, scale_second * UV + 0.5 + velocity_second * floor(TIME * float(updates_per_second)) / float(updates_per_second)).r;
	float bubbles = texture(bubbles_texture, scale_bubbles * UV + 0.5 + velocity_bubbles * floor(TIME * float(updates_per_second)) / float(updates_per_second)).r;

	float pattern_mask = texture(pattern_mask_texture, UV).r;
	float bubbles_mask = texture(bubbles_mask_texture, UV).r;

	float pattern = step(cut, pattern_mask - abs(pattern_1 - pattern_2));
	float b_pattern_1 = step(cut, bubbles - pattern - bubbles_mask);
	float b_pattern_2 = step(1.0 - cut, pattern - bubbles);
	COLOR.a = (b_pattern_1 + b_pattern_2) * color.a;

	COLOR.rgb = color.rgb;
}
And here is a code for caustics without bubbles (lighter):
shader_type canvas_item;
render_mode unshaded, blend_add;

uniform sampler2D SCREEN_TEXTURE : hint_screen_texture, filter_nearest,repeat_disable;

uniform sampler2D pattern_texture: repeat_enable;
uniform sampler2D mask_texture: repeat_enable;

uniform vec4 color: source_color;
uniform vec2 velocity_main = vec2(0.0, 0.04);
uniform vec2 velocity_second = vec2(0.0, 0.04);
uniform vec2 scale_main = vec2(1.0);
uniform vec2 scale_second = vec2(1.0);
uniform float cut: hint_range(0.0, 1.0, 0.01) = 0.5;
uniform int updates_per_second = 1;

void fragment() {
	float pattern_1 = texture(pattern_texture, scale_main * UV + velocity_main * floor(TIME * float(updates_per_second)) / float(updates_per_second)).r;
	float pattern_2 = texture(pattern_texture, scale_second * UV + 0.5 + velocity_second * floor(TIME * float(updates_per_second)) / float(updates_per_second)).r;
	float mask = texture(mask_texture, UV).r;

	float pattern = step(cut, mask - abs(pattern_1 - pattern_2));
	COLOR.a = pattern * color.a;

	COLOR.rgb = color.rgb;
}

But then I thought the procedurally-generated textures via shaders isn't the solution the Atlus team came up with. They most likely used hand-drawn textures the way they did for menu opening transition. But I had already written a shader that looked pretty good in my opinion, so I decided to keep it I didn't want to draw these frames in Inkscape.
I inserted these shaders into ColorRects, set their size, and placed them in appropriate places. I used 1080p as a target resolution, by the way. You can read more about resolutions in docs.
Then I added Gaussian blur. I took it from there. The blur was one of the last things I added to the project, and it greatly affected performance. My Nvidia GTX 1050 Mobile just could't handle it in 1080p at 16.67 ms GPU frametime (60fps). I discuss this later in the background downscaling section.
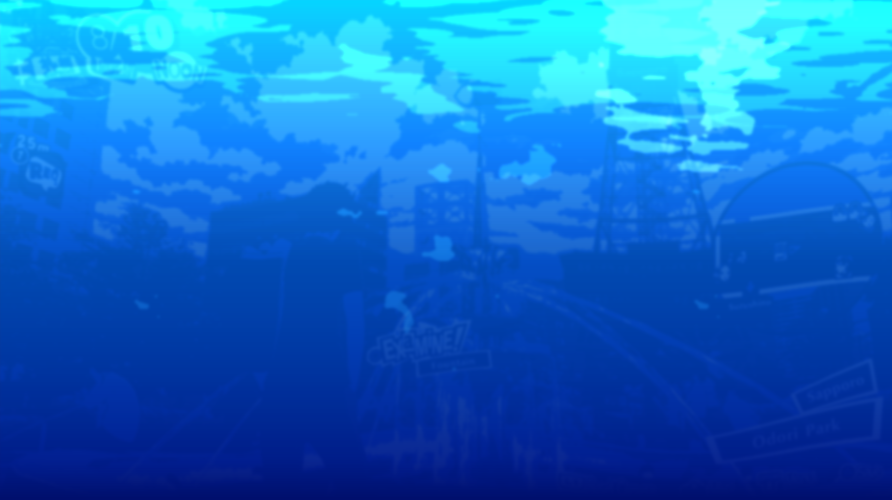
And last but not least is color grading. I just added three overlapping textures:
- Gradient: Transparent top -> Dark Blue bottom.
- Gradient: Light Blue top -> Transparent bottom.
- Blue color. However, it's placed below the caustics to tint only the background.
So, for background I have this node structure:
1. Background `Control`
	1. `SubViewportController`
		1. `SubViewport`
			1. ColorMapping `TextureRect` // initial texture is placed here
			2. Distortion `ColorRect`
			3. Tint `ColorRect`
			4. Caustic1 `ColorRect`
			5. Caustic2 `ColorRect`
	2. Blur `ColorRect`
	3. GradientDark `TextureRect`
	4. GradientLight `TextureRect`
This node tree is placed into another SubViewport, but that one is scaled down. More about it in the background downscaling section. The final result:
Mask transitions
Every transition is an overlapping mask. They use a progress uniform (parameter that you can send to the shader) with values from 0 to 1, representing none and full overlapping.
Every transition uses circumradius to make it sure that the mask is not on the screen with different screen resolutions.
The first transition, which is used on go back transition, is a double-circle mask. In the shader, the second circle is equal to or less than the first, so the circumradius check is used only for the first, the largest, circle.
shader_type canvas_item;


/** Transition of the mask effect. */
uniform float progress: hint_range(0.0, 1.0) = 0.5;
/** Center of the circle in normalized UV coordinates. */
uniform vec2 center_1 = vec2(0.5);
/** Center of the circle in normalized UV coordinates. */
uniform vec2 center_2 = vec2(0.5);
/** The second circle radius is less or equal to the first circle. The value represents how much that radius is scaled down. */
uniform float center_2_scale: hint_range(0.0, 1.0) = 0.8;


void fragment() {
	float aspect_ratio = SCREEN_PIXEL_SIZE.y / SCREEN_PIXEL_SIZE.x;

	// Scale coords to non-square screens.
	vec2 ar_uv = vec2(aspect_ratio * UV.x, UV.y);
	vec2 ar_center_1 = vec2(aspect_ratio * center_1.x, center_1.y);
	vec2 ar_center_2 = vec2(aspect_ratio * center_2.x, center_2.y);

	vec2 mask_1 = ar_uv - ar_center_1;
	vec2 mask_2 = ar_uv - ar_center_2;

	// Calculate circumradius
	float d1 = distance(ar_center_1, vec2(0.0, 0.0));
	float d2 = distance(ar_center_1, vec2(0.0, 1.0));
	float d3 = distance(ar_center_1, vec2(aspect_ratio * 1.0, 0.0));
	float d4 = distance(ar_center_1, vec2(aspect_ratio * 1.0, 1.0));
	float radius = max(max(d1, d2), max(d3, d4));

	COLOR.a = COLOR.a * step(progress * radius, length(mask_1)) * step(progress * radius * center_2_scale, length(mask_2));
}
The second transition is some kind of a blot. It's a circle with wavy border, made with sine. It also rotates a little with its progress.
The blot transition consists of two blot shaders, one of which (the second) is scaled and colorized. The first mask overlaps the second. The second mask's progress is faster, but it starts with a little delay.
The shader code below is used for the first blot mask, but there are also commented lines that are used for the second mask.
shader_type canvas_item;


/** Transition of the mask effect. */
uniform float progress: hint_range(0.0, 1.0) = 0.5;
/** Center of the circle in normalized UV coordinates. */
uniform vec2 center = vec2(0.5);

/** The difference in the farest and the nearest waveness to the center. */
uniform float amplitude: hint_range(0.0, 1.0) = 0.1;
/** Amount of waves. */
uniform float period: hint_range(0.0, 256.0, 1.0) = 5.0;
/** Normalized rotation on 0 progress. */
uniform float base_rotation: hint_range(0.0, 1.0) = 0.0;
/** Added rotation on 1 progress. */
uniform float add_rotation = 0.4;

// The screen is only needed for scaled blot.
// uniform sampler2D screen: hint_screen_texture, filter_nearest;


float calc_angle(vec2 diff) {
	float angle = atan(-diff.y, diff.x);
	if (angle < 0.0) angle += 2.0 * PI;
	return angle;
}

void fragment() {
	float aspect_ratio = SCREEN_PIXEL_SIZE.y / SCREEN_PIXEL_SIZE.x;

	// Scale coords to non-square screens.
	vec2 ar_uv = vec2(aspect_ratio * UV.x, UV.y);
	vec2 ar_center = vec2(aspect_ratio * center.x, center.y);

	vec2 mask = ar_uv - ar_center;

	float d1 = distance(ar_center, vec2(0.0, 0.0));
	float d2 = distance(ar_center, vec2(0.0, 1.0 + amplitude));
	float d3 = distance(ar_center, vec2(aspect_ratio * (1.0 + amplitude), 0.0));
	float d4 = distance(ar_center, vec2(aspect_ratio * (1.0 + amplitude), 1.0 + amplitude));
	float radius = max(max(d1, d2), max(d3, d4));

	float angle = calc_angle(mask);

	float offset = amplitude * sin(PI * base_rotation + period * (angle - progress * add_rotation * PI));
	COLOR.a = COLOR.a * step(length(mask) + offset * progress, progress * radius);

	// This is the code for follow-up close-up transition.
	// It has hard coded values to scale and colorize values from screen texture.
	// vec3 albedo = texture(screen, SCREEN_UV * 0.6 + vec2(0.15)).rgb; // Scale it up and offset
	// COLOR.rgb = vec3(albedo.r * 0.25, albedo.g * 0.5, albedo.b); // Make it more blue
}
Whenever I want to transition from one menu to abother, I change the z-index of desired menu, reset all values to create an initial state for transition, and then just tween it. When the tween animation is finished, I hide the unneeded menu and restore z-index.
There is a
Controlnode option in Godot that disables render ofSubViewportcontent when the node is hidden. So, it's just some easy to implement optimization (one checkbox) that saves a lot of render time.
3D Model
There's an upside-down guy in the background. He is a protagonist called Makoto. In terms of visuals, there are three important features:
- He is swinging like in the water.
- He has white, blue, and black colors without any shading.
- Some parts, instead of using using model-mapped colors, use colors from the background in window coordinates. It is not just transparency, because there is a white polygon in the background which is still overlapped by Makoto.
So, I took the Makoto model from Sketchfab. Then I made a scene with a camera and animations in Blender. Then I made a new texture in Krita, where the alpha channel represents the background mask. The shader looks like this:
shader_type spatial;
render_mode blend_mix, diffuse_burley, specular_schlick_ggx, unshaded;

uniform float fresnel_thickness = 3.0;
uniform sampler2D texture_albedo : source_color, filter_linear_mipmap, repeat_enable;
uniform sampler2D background_texture: source_color;

uniform vec2 window_size = vec2(1920, 1080);

float fresnel(float amount, vec3 normal, vec3 view) {
	return pow((1.0 - clamp(dot(normalize(normal), normalize(view)), 0.0, 1.0 )), amount);
}

void fragment() {
	vec2 uv = SCREEN_UV * VIEWPORT_SIZE / window_size;
	vec4 background = texture(background_texture, uv);
	vec4 albedo_tex = texture(texture_albedo, UV);

	float mix_value = albedo_tex.a * (1.0 - albedo_tex.b * fresnel(fresnel_thickness, NORMAL, VIEW));

	ALBEDO = mix(background.rgb, albedo_tex.rgb, mix_value);
}
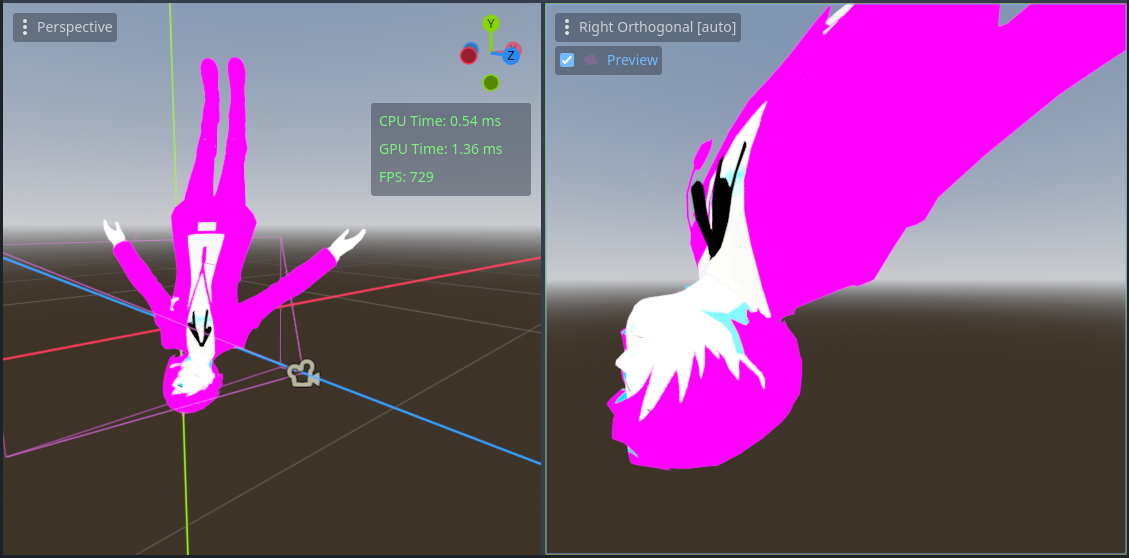
On the image above, the pink color represents the background mask.
I also used fresnel as a mask. This way, the edges will show the background instead of the character textures. You can see it on the collar, the nose, and the mouth.
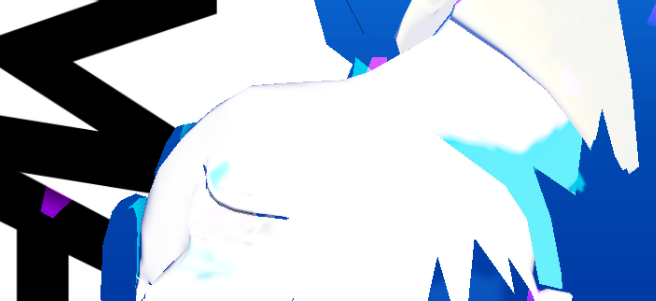
The last thing is viewport mapping. The container that holds the SubViewport, has a fixed size and is anchored to the left. If the monitor resolution is not 1920x1080, then SCREEN_UV and the window UV are not the same. It will result in a visual bug:

So instead of just SCREEN_UV, I need to use window UV.
The container with Makoto is anchored to the left, and the height is constant on landscape resolutions. The (0,0) point in Godot is top left, so there is no reason to consider the offset. So, I used a simple proportion to find the window UV.
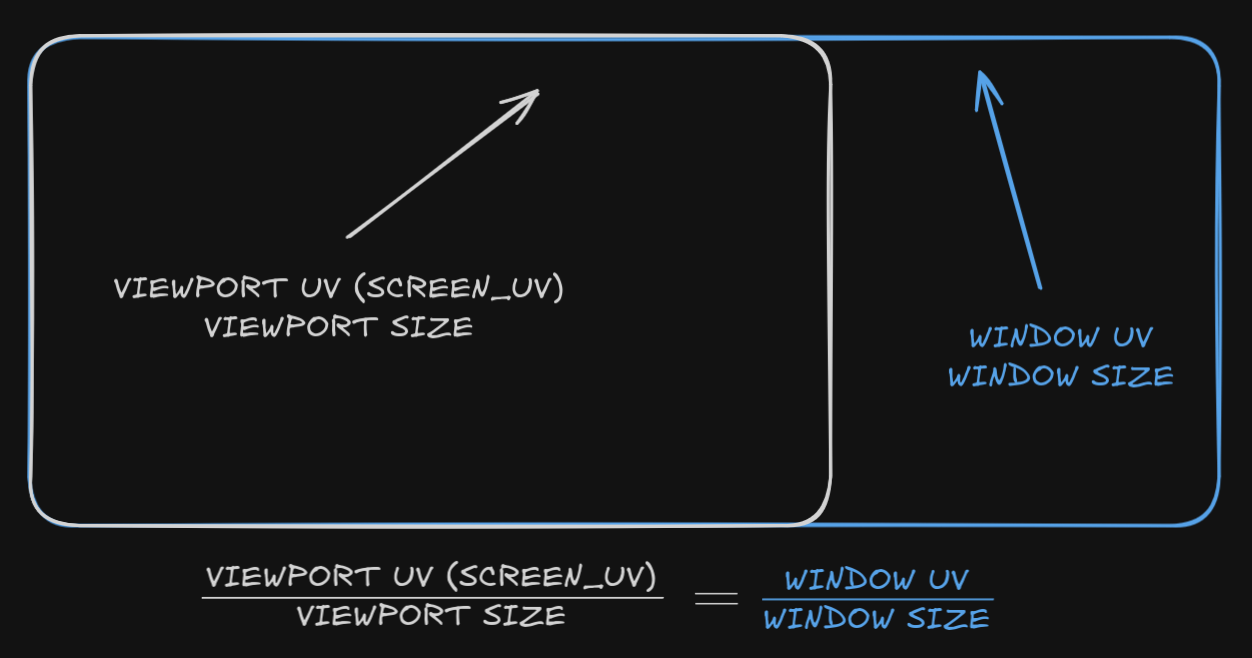
SCREEN_UV and VIEWPORT_SIZE are shader globals, and I can pass the window size to the shader via a uniform when the window size has changed. The code responsible for finding window UV in the shader is this:
vec2 uv = SCREEN_UV * VIEWPORT_SIZE / window_size;
The problem was gone:

Cursor
The cursor consists of two triangles. One is red, and the other is white. But there are some rules:
- When the triangles and the black text overlap, the overlapping part becomes red.
- When the triangles and the bluish text overlap, the overlapping part becomes white.
- When the triangles do not overlap the text, they keep their color with
addcolor mixing.
So, the text should be rendered on a different texture, so I used another SubViewport. It is also useful for text effects, so I ended up with shader code similar to this:
shader_type canvas_item;
render_mode blend_add;

const vec3 WHITE = vec3(1.0);
const vec3 RED = vec3(1.0, 0.0, 0.0);
const float BLUE_TRESHHOLD = 0.05;

uniform sampler2D text_viewport_texture: filter_nearest;

void fragment() {
	vec4 text = texture(text_viewport_texture, SCREEN_UV);

	if (text.b < BLUE_TRESHHOLD) {
		COLOR.rgb = mix(COLOR.rgb, RED, text.a);
	} else {
		COLOR.rgb = mix(COLOR.rgb, WHITE, text.a);
	}
}
Most of the background is very blue, and the only non-blue things are black like the selected text. So I decided to check the blue channel to distinguish text overlapping rules.
The cursor also has moving and twitch animations. I used two tweens for them accordingly. The moving tween is used for moving the cursor between the text options and for pause menu opening. When moving between options, the tween:
- Translates the cursor to the text position.
- Rotates the cursor to the text angle, but with an offset value for the red triangle, which is different for each text option. I just used some stupid formula that actually worked out great, but it's a good idea to set up the angle manually.
- Scales it to fit text. I did this:
scale = Vector2(text.size.x / 135.0, text.size.y / 40.0). Don't judge me.
On spawning, the tween translates the cursor based on the position of dummy (empty) text. The code looks like this:
var dummy_transform := dummy.transform

if cursor_moving_tween:
	cursor_moving_tween.kill()

cursor_moving_tween = create_tween()
cursor_moving_tween.set_trans(Tween.TRANS_CIRC)

var offset_1 := dummy_transform.origin + Vector2(1., -1.) * 40.0
var offset_2 := dummy_transform.origin - Vector2(1., -1.) * 20.0
var offset_3 := dummy_transform.origin + Vector2(1., -1.) * 10.0
var offset_4 := dummy_transform.origin

cursor_moving_tween.tween_property(self, "position", offset_2, 0.2)
cursor_moving_tween.chain().tween_property(self, "position", offset_3, 0.1)
cursor_moving_tween.chain().tween_property(self, "position", offset_4, 0.1)
I used only one tween for both moving between and spawning because it lets me relatively smoothly transition from spawning animation to moving animation. It happens when the user decides to move the cursor when the menu just begins to open. It feels very snappy and cool.
There is also a twitch animation. It triggers on a timer timeout event or when the cursor is moved. The timer runs again after every twitch.
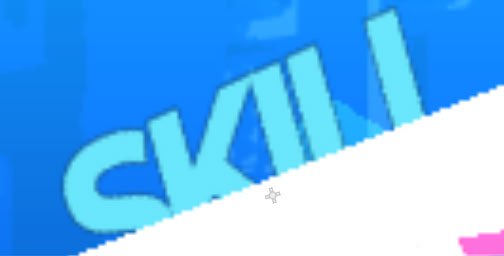
Text effects
There are menu options and their properties are:
- The text can be either some shade of blue or black when it's selected.
- The text has some wavy animations when it's not selected.
- The text has some white caustic flares when it's not selected.
- The text changes its scale when selected.
- When the menu opens, the text appears from transperency and moving down.
I made a separate SubViewport for the sake of the cursor. All text options belong to this node.
The font I used is Montserrat, because it looks similar to the game's font.
I decided to make a material for the blueish text, and not a separate material for the black text (the selected one), because default Label parameters will do. I just swap text color/material when I need to with a script.
All the colors are set in font_color theme property. The script uses tweens to interpolate color values, scaling and z-indexing (selected is on top). It's also handle some button-relative event logic.
To make scaling properly, you need to set
pivot_sizetosize * 0.5and update this variable every time thesizechanges.
All the other visual stuff happens in the shader:
- For the flare effect, I created a noise texture that is used as a mask.
- For the wavy effect, I use a sine and a UV offset.
- For the spawn moving animations, I use a
VERTEXoffset with aprogressuniform.
shader_type canvas_item;

uniform float spawn_progress: hint_range(0.0, 1.0) = 1.0;
uniform vec2 spawn_offset;

uniform float speed: hint_range(0.0, 10.0, 0.01) = 1.0;
uniform float period: hint_range(0.0, 1000.0, 0.01) = 100.0;
uniform float amplitude: hint_range(0.0, 0.01, 0.0001) = 0.004;

uniform sampler2D flare_texture: repeat_enable;
uniform vec3 flare_albedo: source_color = vec3(1.0);
uniform float flare_strength: hint_range(0.0, 2.0) = 1.0;
uniform float flare_speed: hint_range(0.0, 1.0) = 0.05;


void vertex() {
	VERTEX += spawn_offset * spawn_progress;
}


void fragment() {
	vec2 uv = UV;
	uv.x = uv.x + sin(uv.y * period + TIME * speed) * amplitude;
	COLOR = texture(TEXTURE, uv) * COLOR;

	float flare = texture(flare_texture, SCREEN_UV + TIME * flare_speed).r;
	COLOR.rgb += flare * flare_albedo * flare_strength;
}
There was also a visual bug, that added a disgusting dark outline.
This happens because of bilinear interpolation. Imagine there are two pixels nearby: [0,0,255,255] and [76,76,76,0]. They are total blue and Godot's default gray background, which is actually transparent. When the GPU needs to calculate a color between them, it sums them up and divides by 2. So, it's [38,38,165.5,127.5], a transparent dark blue. This is not what we actually need. We need a total blue color that is semi-transparent.
There is a technique called "Premultiplied Alpha". It means that before mixing, we need to multiply albedo by alpha/255. This way, we get [0,0,255] and [0,0,0] albedos. And now the mixed color is [0,0,127.5,127.5]. When we decide to render it, we unmultiply the albedo with alpha; that is, we multiply the albedo value by 255/alpha. As a result, the final color is [0,0,255,127.5], which is what we want. You can read more about it in the great article on Real-time Rendering.
To do this in Godot, I added CanvasItemMaterial to the SubViewport mentioned and set its blend_mode parameter to BLEND_MODE_PREMULT_ALPHA. That's all.
I did the same thing for the viewport with 3D model.
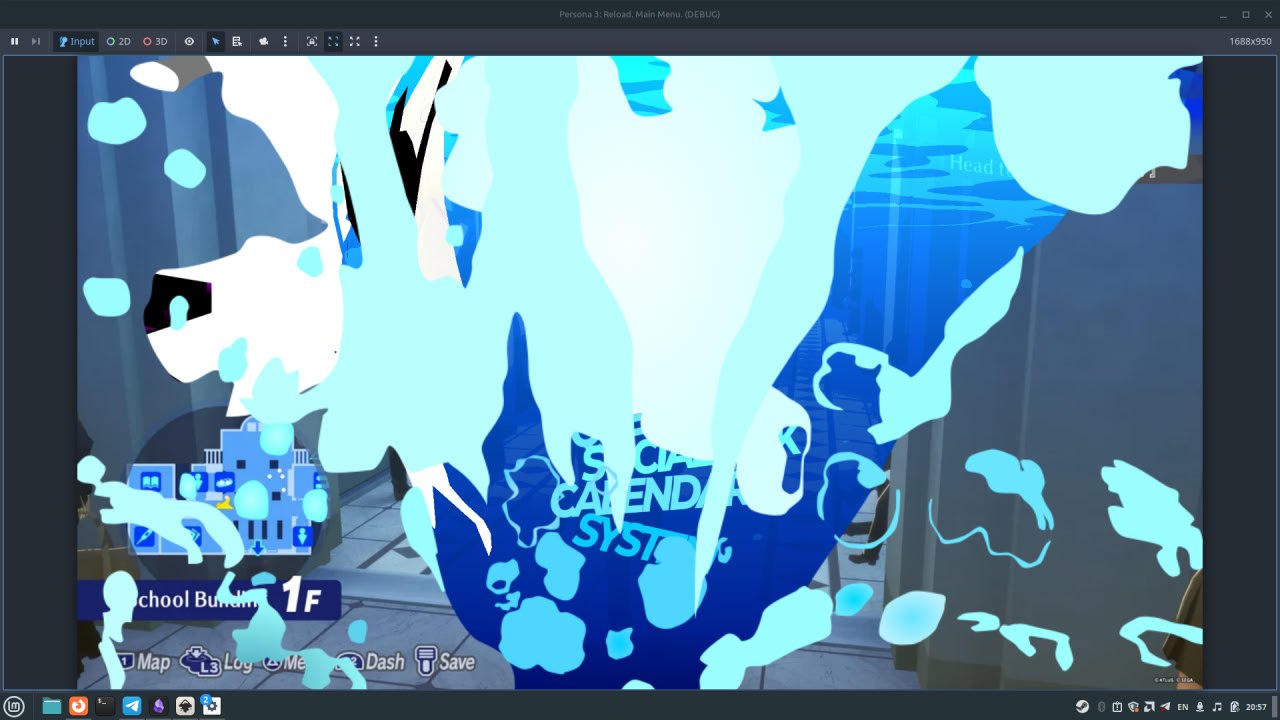
Menu opening transition
Several things happen when the menu opens:
- Text animations.
- Cursor animations.
- Makoto falls down.
- Pretty frame sequence appears.
I kinda explained the first three parts, but the last thing I didn't. So, what is it?
When the menu opens, it shows 10 frames. Some of them are used as a mask for the gameplay background, because the transition combines visuals from gameplay and the menu. You can see this in WIP screenshot below:
So, what I needed were frames and masks. I decided that I should use SVG images for that because they would support multiple resolutions and be crisp in any of them. I drew them in Inkscape.
SVG doesn't have dynamic scaling in Godot 4.4, but as much as I recall, it's not an issue in Godot 4.5.
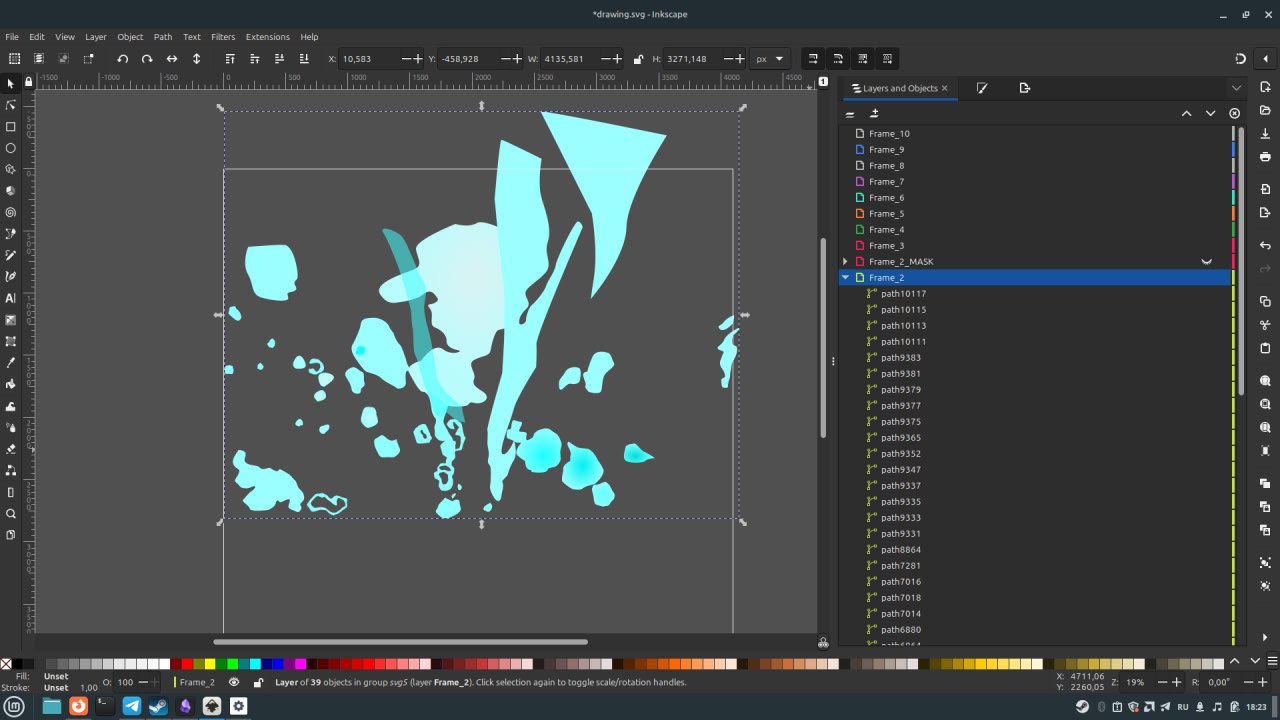
I also thought that it would be a good idea to make the image square. This way, I can support landscape resolution with different widths. I made a lot of details at the center, and not so much at the bottom and the top.
Frames are played sequentially, with a frame time of 50ms, 3/60 fps. I determined this by eye. If the target monitor uses another frequency, like 90Hz, there is a problem. The animation is too quick to just ignore it, and there is some kind of a frame drop. Usually, developers just drop a frame, but I decided to make a fluent frame time based on the monitor's refresh rate:
var refresh_rate := DisplayServer.screen_get_refresh_rate()
var frame_time := roundf(refresh_rate / (1. / target_frame_time)) / refresh_rate
For target_frame_time I chose 3/60, it's 50ms. How much error do we have?
| Hz | Frames | Rounded | Error |
|---|---|---|---|
| 30 | 1.5 | 2 | 0.5 (33.3%) |
| 50 | 2.5 | 2 | 0.5 (20%) |
| 60 | 3 | 3 | - |
| 75 | 3.75 | 4 | 0.25 (6.67%) |
| 90 | 4.5 | 4 | 0.5 (11.1%) |
| 100 | 5 | 5 | - |
| 120 | 6 | 6 | - |
| 144 | 7.2 | 7 | 0.2 (2.78%) |
| 165 | 8.25 | 8 | 0.25 (3.03%) |
| 240 | 12 | 12 | - |
| 360 | 18 | 18 | - |
round()rounds to even numbers if the number is*.5.
50 FPS is not a very popular target, but 30 FPS is. But I don't actually care. I think it's decent.
Atlus developers handle the situation differently: they lock the entire game to 60 FPS. I think they did this because:
- They are mostly console developers and are used to an FPS lock.
- Gameplay is not very fast. It's mostly turn-based.
- Art is consistent on all platforms.
Menu state info
There is a white polygon with "MAIN" and index number. That number represents the selected menu option. It's just a simple observer. Text has modified built-in font parameters, and it is anchored to the left: the "MAIN" to the bottom and the index to the top. There is a white polygon in the background, which is also anchored to the left.
There is also white text on the bottom right. It also updates with the selected menu option.
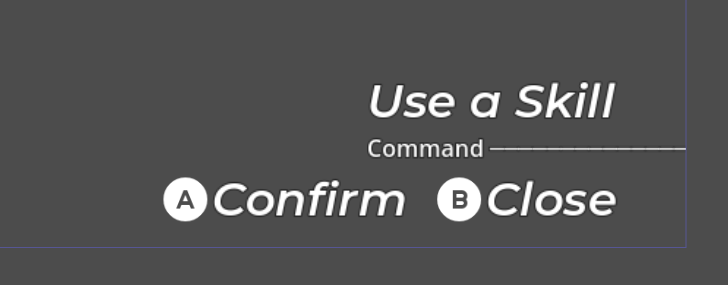
This tooltip has a title and a subtitle. On the image above, the title is Use a Skill, and the subtitle is Command. The subtitle has a dynamic line, the length of which is based on the title's length. If you want to do this, I suggest you use an HBoxContainer with a Label and an HSeparator and make its size dynamic and its position anchored based on the title's length. The structure of the tooltip may look like this:
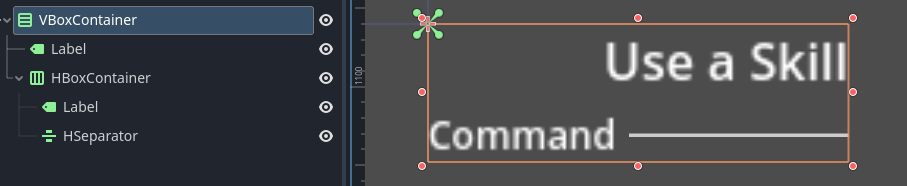
But I wanted to mess around with labels, so I used multiple ─ symbols as a line. So, the tooltip consists of two Labels, and the second one (the subtitle) has clip_text set to true. The script looks like this:
@tool
extends Control
class_name TooltipUI

const TRAILING_LINE = " ────────────────────────────────────────────────────────────────────────────"

@onready var title_label: Label = $Title
@onready var sub_title_label: Label = $SubTitle

@export var title: String = "Title" :
	set(v):
		title = v
		if is_node_ready():
			var previous_size := title_label.size
			title_label.text = title
			# Forcefully recalculate container with new title text.
			# Otherwise, node size will be recalculated later.
			title_label.reset_size()
			_recalculate_titles_position(previous_size)
@export var sub_title: String = "Sub" :
	set(v):
		sub_title = v
		if is_node_ready():
			sub_title_label.text = sub_title + TRAILING_LINE


func _recalculate_titles_position(previous_size: Vector2) -> void:
	title_label.position = title_label.position + previous_size - title_label.size
	sub_title_label.position = title_label.position + Vector2(0.0, title_label.size.y)
	sub_title_label.size = Vector2(-sub_title_label.position.x, title_label.size.y)


func _ready() -> void:
	title = title
	sub_title = sub_title
The result is kinda ridiculous, because even if it works, it has visual bugs due to strange shadow rendering on overlapping characters. I decided to keep it because at this point, I was really tired of the project. When I exported the project for web, I saw Unicode error symbols instead of ─. I don't want to mess around with Unicode, so I made it the way I suggested. It's like, I was done in less than five minutes. I used StyleBoxFlat for styling, and the new code looks like this:
@tool
extends Control
class_name TooltipUI

@onready var title_label: Label = $Title
@onready var sub_title_container: HBoxContainer = $SubTitleContainer
@onready var sub_title_label: Label = $SubTitleContainer/SubTitle

@export var title: String = "Title" :
	set(v):
		title = v
		if is_node_ready():
			var previous_size := title_label.size
			title_label.text = title
			# Forcefully recalculate container with new title text.
			# Otherwise, node size will be recalculated later.
			title_label.reset_size()
			_recalculate_titles_position(previous_size)
@export var sub_title: String = "Sub" :
	set(v):
		sub_title = v
		if is_node_ready():
			sub_title_label.text = sub_title


func _recalculate_titles_position(previous_size: Vector2) -> void:
	title_label.position = title_label.position + previous_size - title_label.size
	sub_title_container.position = title_label.position + Vector2(0.0, title_label.size.y)
	sub_title_container.size = Vector2(-sub_title_container.position.x, title_label.size.y)


func _ready() -> void:
	title = title
	sub_title = sub_title
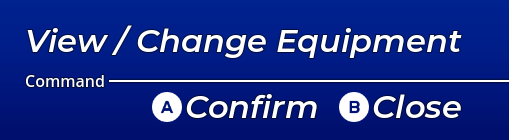
And now the line is crisp:
There are also some keybinds buttons. I didn't do it and just kept the placeholders. But what you should do is use some kind of singleton to detect what device was used last. It's like you should override _input(event: InputEvent) -> void and then check whether it is a gamepad event or not. You can load button images with StringName from your asset folder. The icons are made by the ubiquitous Kenney.
There is also money info, but whatever.
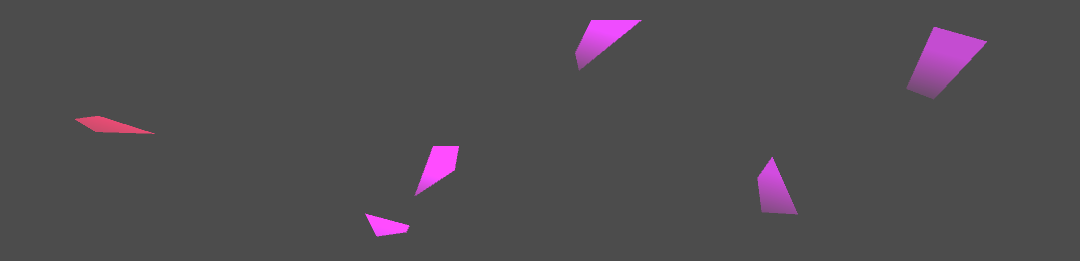
Confetti
It was one of the easiest things. It's just polygons (Polygon2D in Godot) with a gradient color and add color mixing.
Adaptive layout
The layout looks good in different landscape resolutions.
I mean, the caustics are kind of a mess, but I think it's a matter of some shader tweaks. I mentioned one of these tweaks in the 3d model section. Godot's container system is pretty good for building UI, so I just used anchoring and sizing.
Sounds
For sounds, I made a singleton scene with multiple AudioStreamPlayers and a script with functions like play_*(). Maybe it's a good idea to spawn AudioStreamPlayers whenever I need them and remove them once they're done, and instead of a play_*() function, create play(sound_name: StringName). But the project isn't big, so I kept things simple.
Sounds were made by graaveaty, thanks to him. He is very shy and doesn't share his music. And whenever he actually shares his music, he removes them quickly, which is why his SoundCloud profile is empty.
Performance
The UI is not very resource-intensive, but there are some important things I came across.
Viewport resource consumption
Every SubViewport utilizes GPU. It uses memory and processing power. It's a good idea to turn off the rendering when the viewport is not needed. The default parameter for render_target_update_mode is UPDATE_WHEN_VISIBLE, so I just hid the viewports I didn't need.
The other important thing is to use as few SubViewports as possible, because the amount of viewports relates to performance even if they are hidden. Or I did something wrong, but still. If you can group the nodes into one SubViewport, please do it.
Background downscaling
I changed it a little. I just changed int(round(3.0 * sigma)) to 3. It will not change image quality with my parameters, but it's quite good for performance. It means that the shader for every pixel looks at the nearest pixels only (3 * 2 + 1)² = 49 times, instead of (sigma 3 * 2 + 1)², where sigma ∈ N (what is N?). Which is still quite a lot, actually.
So, this is the most important optimization in the pipeline. It's a waste to use full screen resolution to render blurred image. Instead, it's a good idea to use a smaller resolution. So I used a resolution which has a size three times less than the target.
Here is what I got:
| Resolution | GPU frametime (ms) | GPU frametime (relative) |
|---|---|---|
| Normal | 28.0 | ████████████████████████████ |
| Half | 17.0 | █████████████ |
| Third | 12.5 | ███████████▌ |
The test was in 1080p on my Nvidia GTX 1050 Mobile. Only the third resolution holds to the 60 FPS cap (16.67 ms). I think it's good.
Wraping up
You can see what I made and what Atlus made below, respectively.
I think I did a good job. I may have messed up with aliasing, and the background blur is not very pretty, but at least you can try it out in the browser. I also think that Godot's UI system allows developers to make a badass UI.
The code I wrote is disgusting, but I didn't intend to make it pretty. This project is more like a sandbox for exploring different UI stuff. You can find it on GitHub.
There are a lot of things I didn't make, like input buffering, mouse input, translations, etc. It's because it's "out of scope," or whatever. Maybe I'll do it next time.